No-Bake Cheesecake and Biscoff Cups – Pin Your Pin
If you like gourmet desserts but don’t want to spend hours in the kitchen, No-Bake Cheesecake and Biscoff Cups are the perfect solution! These little cups combine the rich flavor of Biscoff biscuits with a smooth and creamy cheesecake filling. Best of all? No oven is needed. This simple dessert is perfect for anyone looking to satisfy their sweet tooth with minimal effort.
Why no-bake desserts are a game changer
There are days when you crave a delicious dessert but don’t have the time or patience to cook. This is where no-bake desserts shine. A little preparation, a little chilling and you have a treat that is both impressive and easy to prepare. Personally, I love no-cook recipes because they save time while still providing lots of flavor.
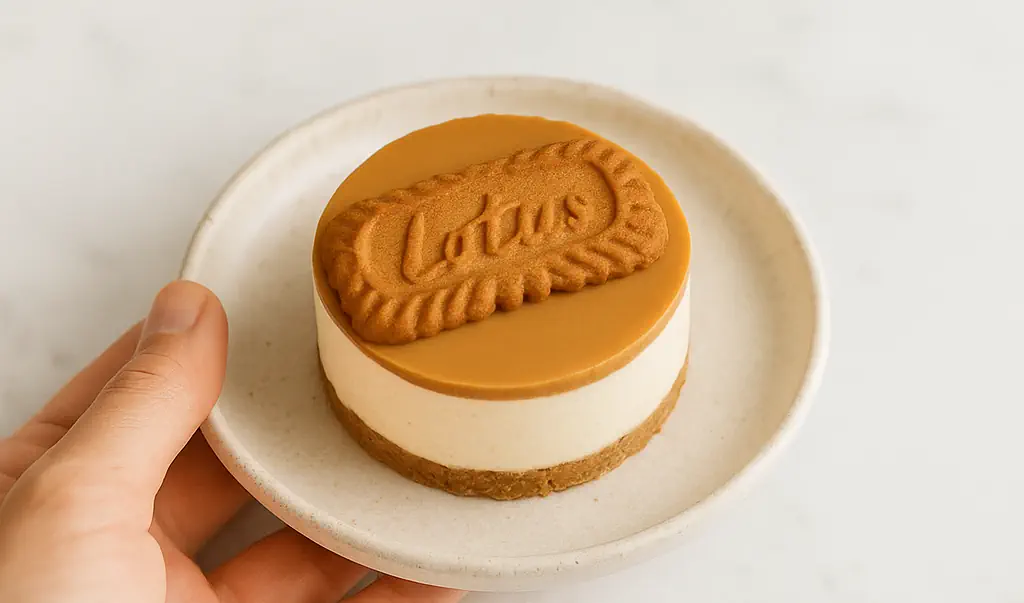
If you have never tried a Biscoff cheesecakeyou will enjoy yourself. THE Biscoff biscuits add wonderful texture and flavor to the crust, while the creamy filling is light and creamy. It’s a perfect balance of flavors and textures.
Ingredients for No-Bake Biscoff Cheesecake Cups
Here’s what you’ll need to create these delicious cheesecake cups:
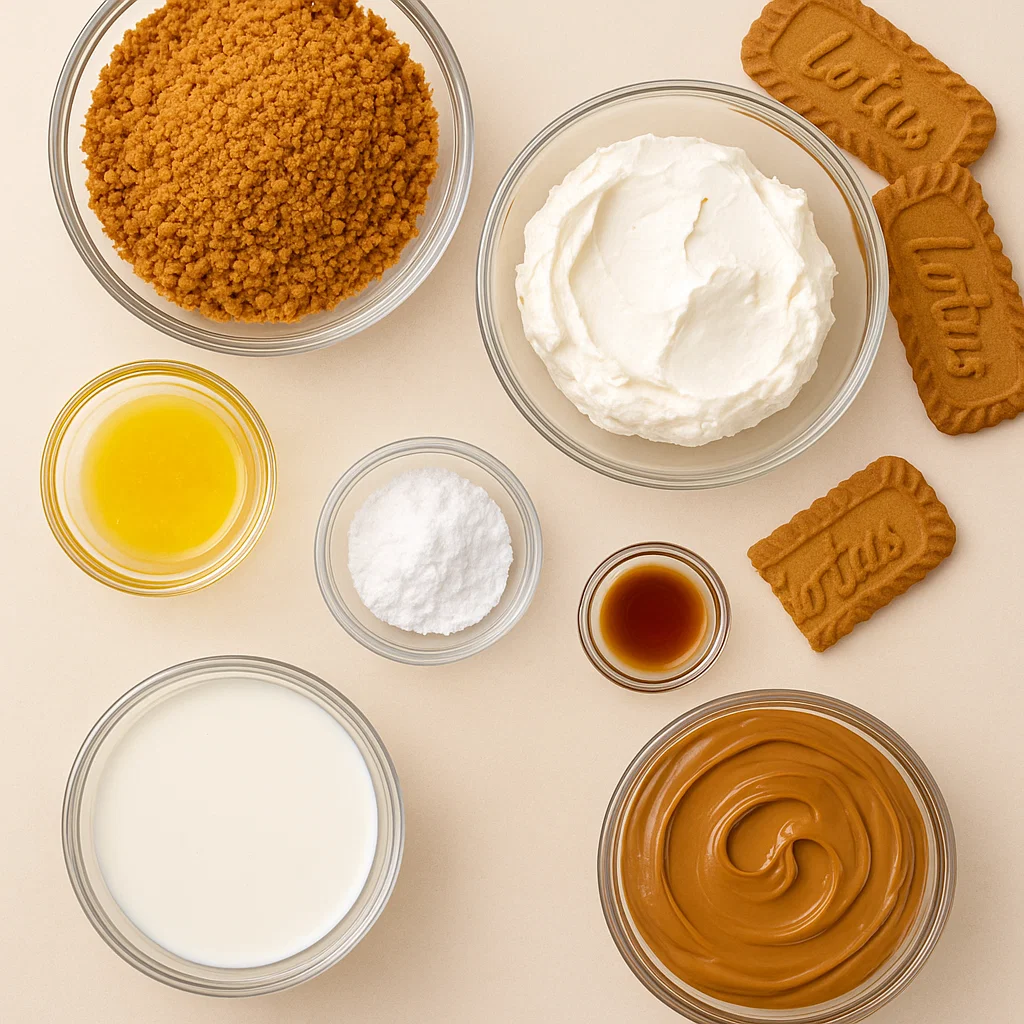
- 1 cup (120 g) Biscoff cookie crumbs (about 10 cookies)
- 3 tablespoons (45 g) melted butter
- 8 oz (225 g) cream cheesesoftened
- 1/4 cup (30 g) powdered sugar
- 1 teaspoon of vanilla extract
- 1/2 cup (120 ml) heavy cream
- 1/2 cup (120 g) biscoff spread (or more for garnish)
- Optional: Extra Biscoff cookies for garnish
Step-by-Step Guide to Making No-Bake Biscoff Cheesecake Cups
1. Prepare the crust
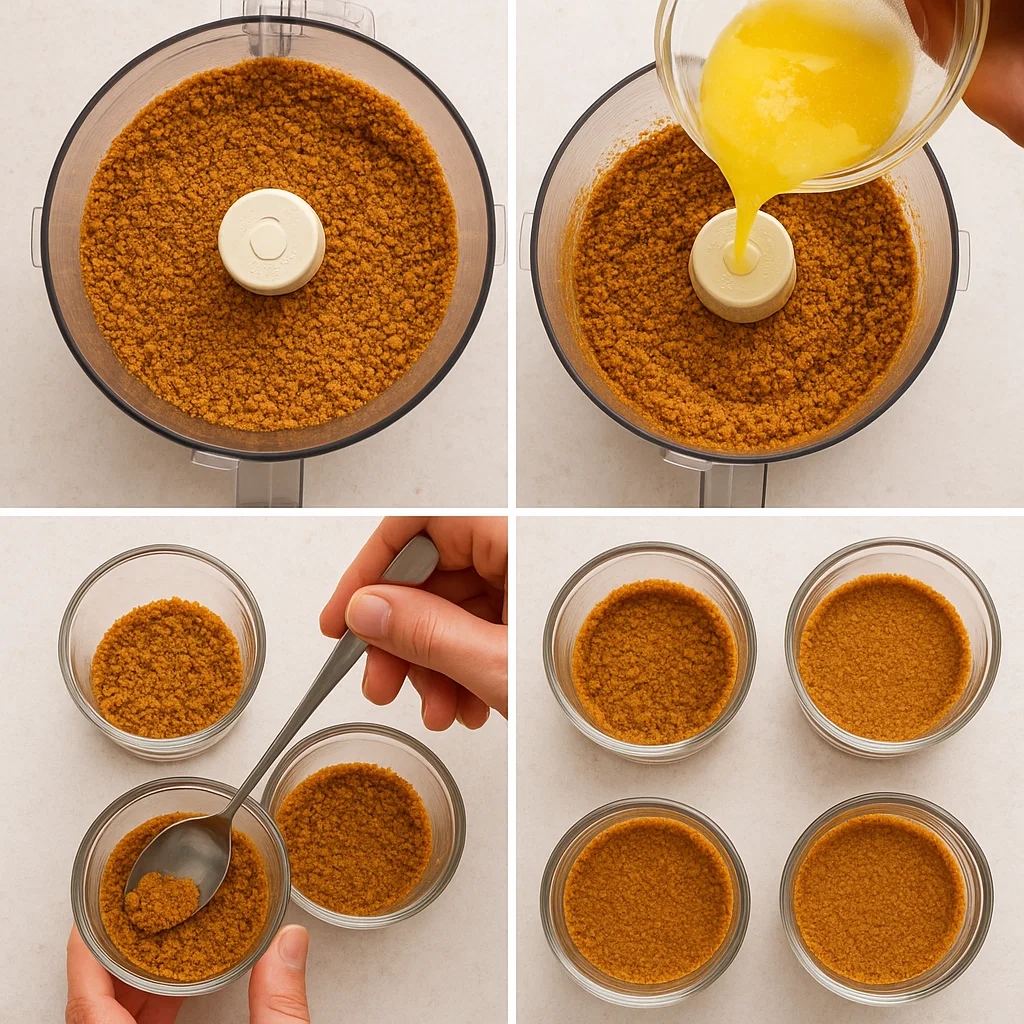
Start by doing the Biscoff cookie crust. It’s a very simple step:
- Crush Biscoff biscuits in a food processor until fine crumbs (about 1 cup or 120 g).
- Mix the crumbs with 3 tablespoons of melted butter (45g) until it resembles wet sand.
- Spoon about 1 tablespoon of the mixture in each cup (you can use small mason jars, shot glasses or clear cups).
- Press firmly with a spoon to obtain an even layer.
2. Prepare the cheesecake filling
Next, let’s prepare the creamy cheesecake filling:
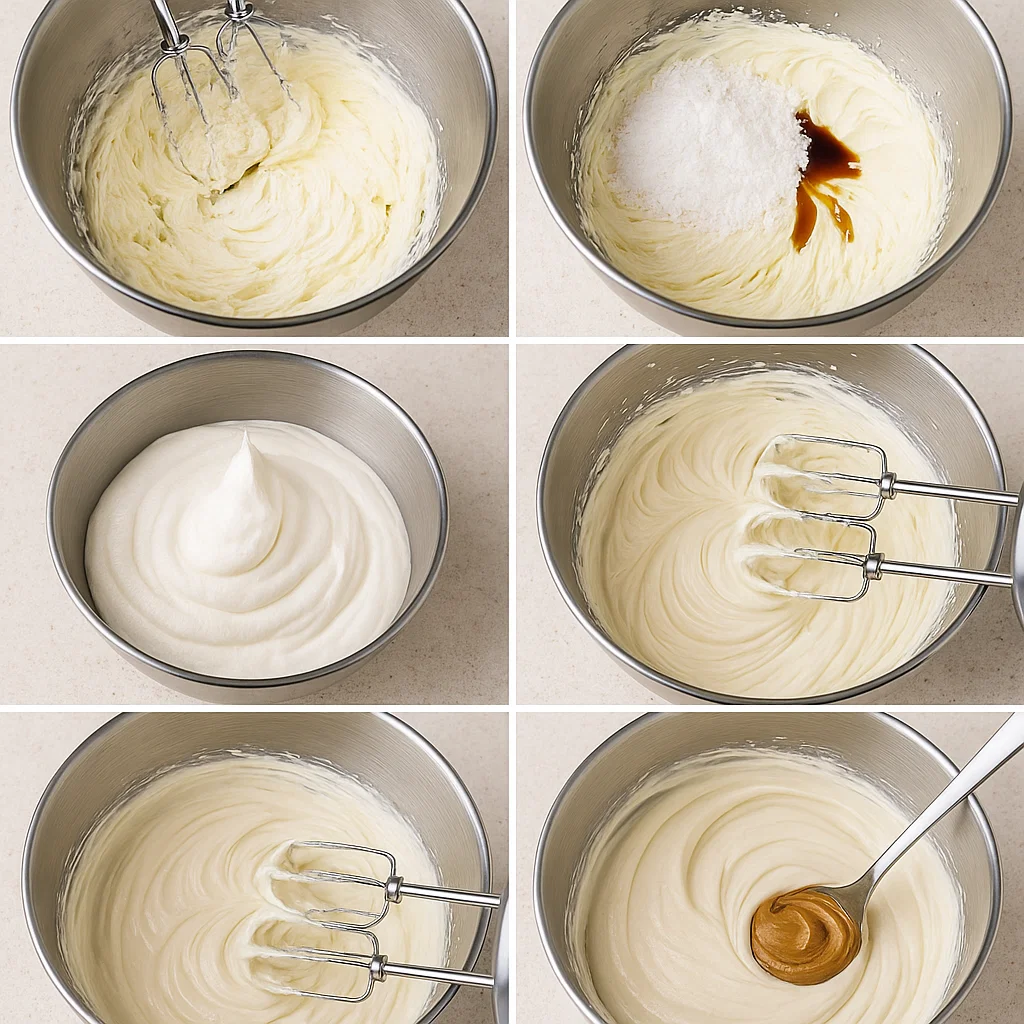
- Beat cream cheese in a mixing bowl until smooth (about 1 to 2 minutes).
- Add Powdered sugar (30g) and vanilla extractthen blend until smooth.
- In another bowl, whisk the thick cream (120 ml) until stiff peaks form.
- Gently fold whipped cream into cream cheese mixture until smooth.
- Incorporate Biscoff spread (120g), making sure everything is well combined.
3. Assemble the cups
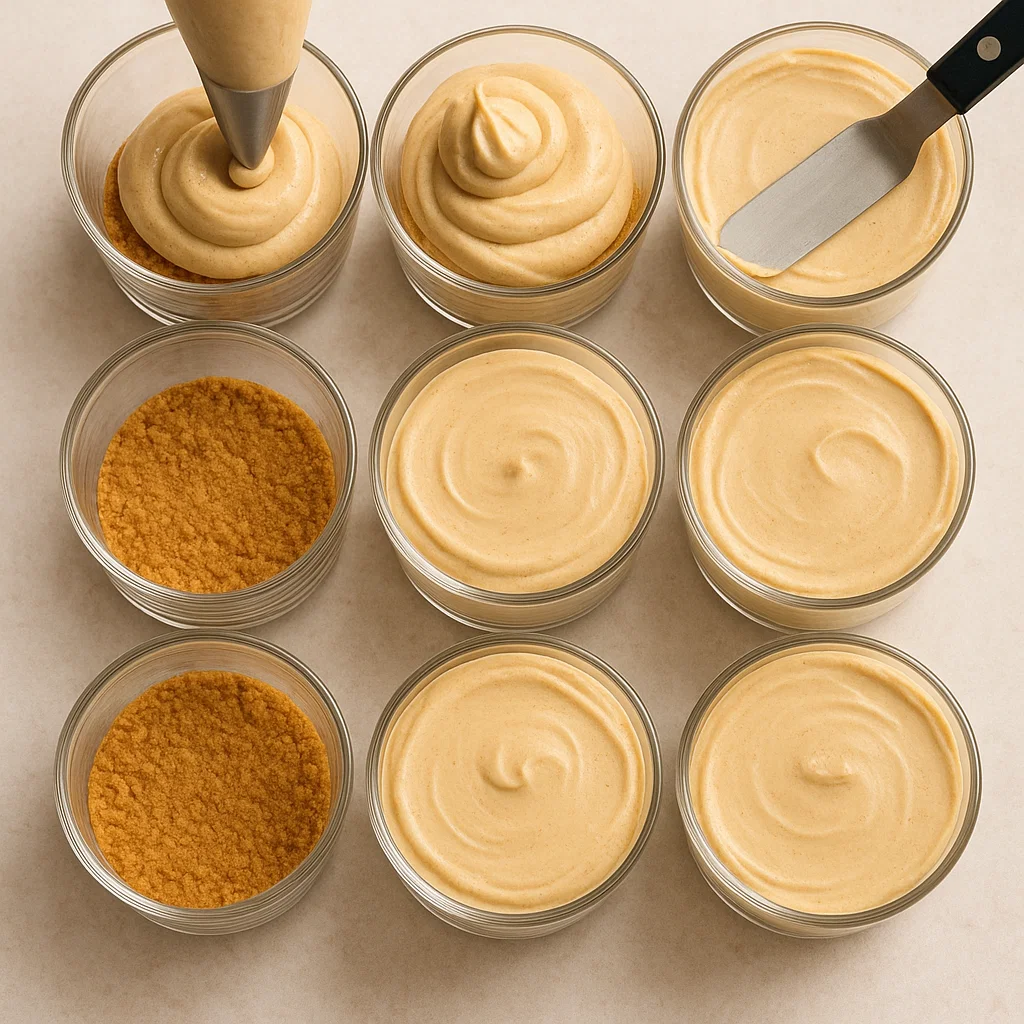
Now that your crust and filling are ready, it’s time to assemble:
- Pour or spoon cheesecake filling onto prepared crust in each cup.
- Smooth the top with a spatula or the back of a spoon for an even finish.
4. Cool and set
Place the filled cups in the refrigerator to set. Let them cool at least 2 hoursbut if you have time, nighttime works even better.
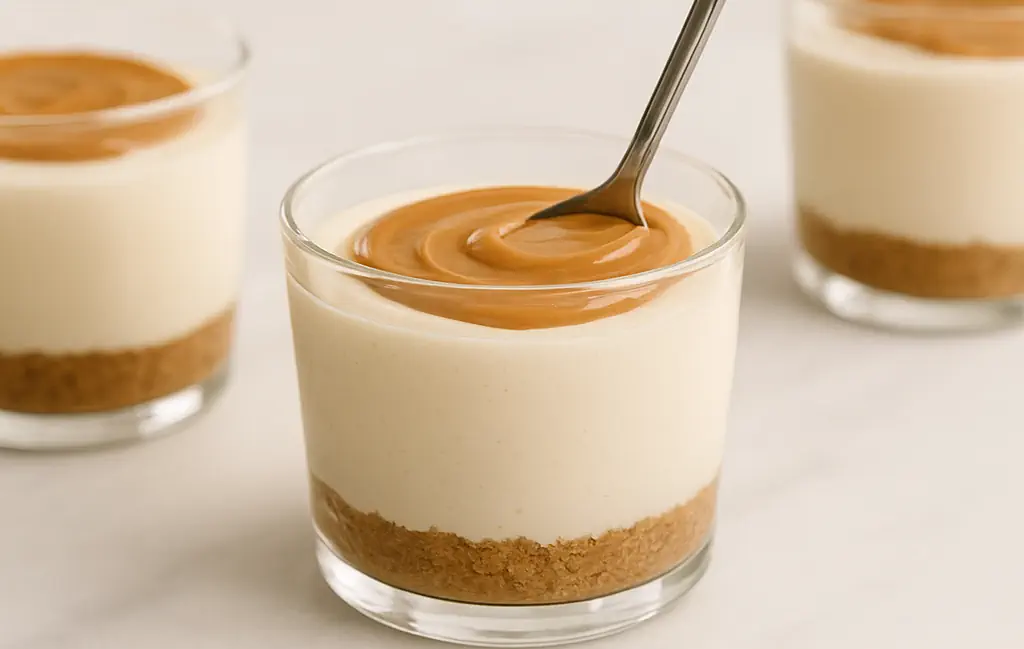
5. Garnish and serve
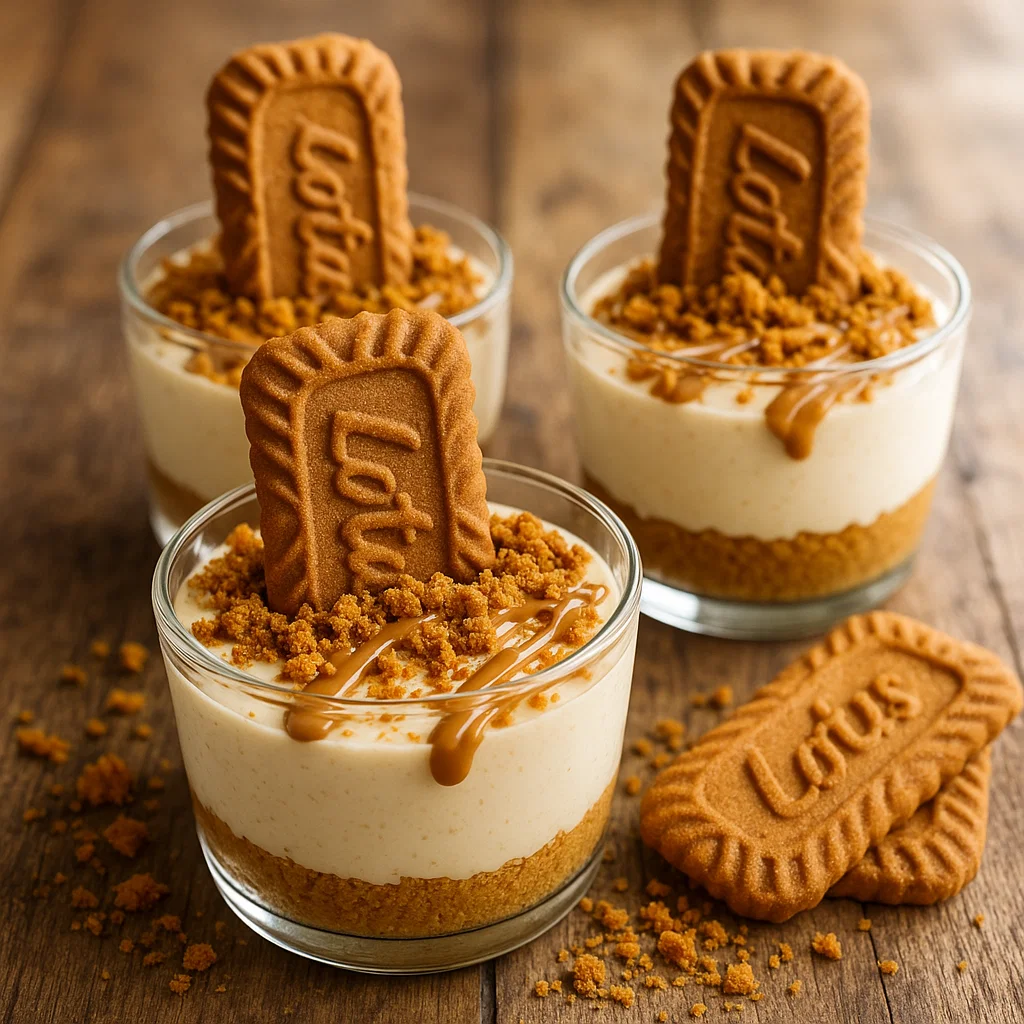
Once the cheesecake molds are set, garnish with extra biscoff crumbs or a drizzle of Biscoff spread for that extra flavor. You can even top with a whole Biscoff biscuit for the perfect finishing touch.
Why These No-Bake Biscoff Cheesecake Cups Are So Good
- Quick and easy: Perfect for when you’re craving something sweet but don’t want to spend a lot of time in the kitchen.
- Rich and tasty: The combination of Biscoff biscuits And cheesecake is unbeatable. It’s a sweet, indulgent treat that’s sure to impress.
- Customizable: You can add different toppings or mix in additional ingredients, like caramel sauce or chocolate chips, to give your coasters a personal touch.
Final Thoughts: Try these no-bake biscoff cheesecake cups today!
These No-Bake Cheesecake and Biscoff Cups will definitely please everyone! Whether you’re hosting a party or just looking for a treat to enjoy at home, they’re an easy and delicious option. With minimal effort, you’ll have a decadent dessert ready to go.
Call to action:
Can’t wait to try these no-bake cheesecake cups? Grab your ingredients and get started today! Don’t forget to share your creations with me in the comments below!
Post Comment